The Classic Obi: How to Tie a Taiko Musubi
Every movement in Japanese art has meaning and purpose, and is done with precision and perfection. In the simplest way I could put it, I love kitsuke because it is essentially folding fabric in beautiful shapes, creating the most flattering lines for the female body that can find a balance between being provocative and demure. The beauty of kimono is that there are many different types, styles, and fabrics to cater to a specific occasion or season. This however is also a reason why wearing a kimono is becoming a dying art, with fewer and fewer women wearing kimono for reasons of convenience and complexity. Not only is it difficult for most women to put on by themselves, the categories of kimono, including when a certain kimono can be worn is specific, making it a bit cumbersome and overwhelming to keep in practice. In addition to choosing the right kimono to suit the occasion/season, there are also the accessories that you must correctly match with the outfit.  This is the main reason it may be necessary to go to a kimono school to learn all the intricacies and traditions of wearing proper kimono. In my opinion, I truly believe that traditional old school kimonos are more beautiful than many of those weird sparkly, Barbie-type kimonos that girls wear during Seijin Shiki these days. However I am also a firm believer in using your personal style and creativity, and as long as it’s not on a serious formal occasion, it’s perfectly alright to bend the rules. Nowadays a lot of younger kitsuke senseis are more accepting about how different outfits are put together. Although the Japanese culture and tradition is so respected and sophisticated because things remain unchanged for years, often with a one and only way to do something, I think a little flexibility can keep kimono wearing alive in modern times and help spread the art of kimono internationally.
The obi sash is the one component that can allow you to really express your creativity and set yourself apart from others: the type of obi, pattern, and the musubi (way of tying the bow) changes the look and formality of the whole outfit, which is why I think the obi is more important to how the whole kimono looks visually. With origins in functionality, it has become almost the main fashionable accessory. The various ways of tying obi musubi is most definitely an art form in itself, basically akin to doing origami with beautiful fabric.
I’m going to go with the most commonly worn, classic obi type of musubi: Taiko musubi, named after the famed Tokyo bridge for its drum like shape. For a casual occasion (although now there are also formal types), you must use Nagoya obi. This obi has a wide end (the tail end of the obi and part that is ultimately shown as the “taiko†– taresaki) and is folded and sewn in half about halfway, making it easier to tie around the waist – tesaki.


Aside from the obi, the accessories you need are:
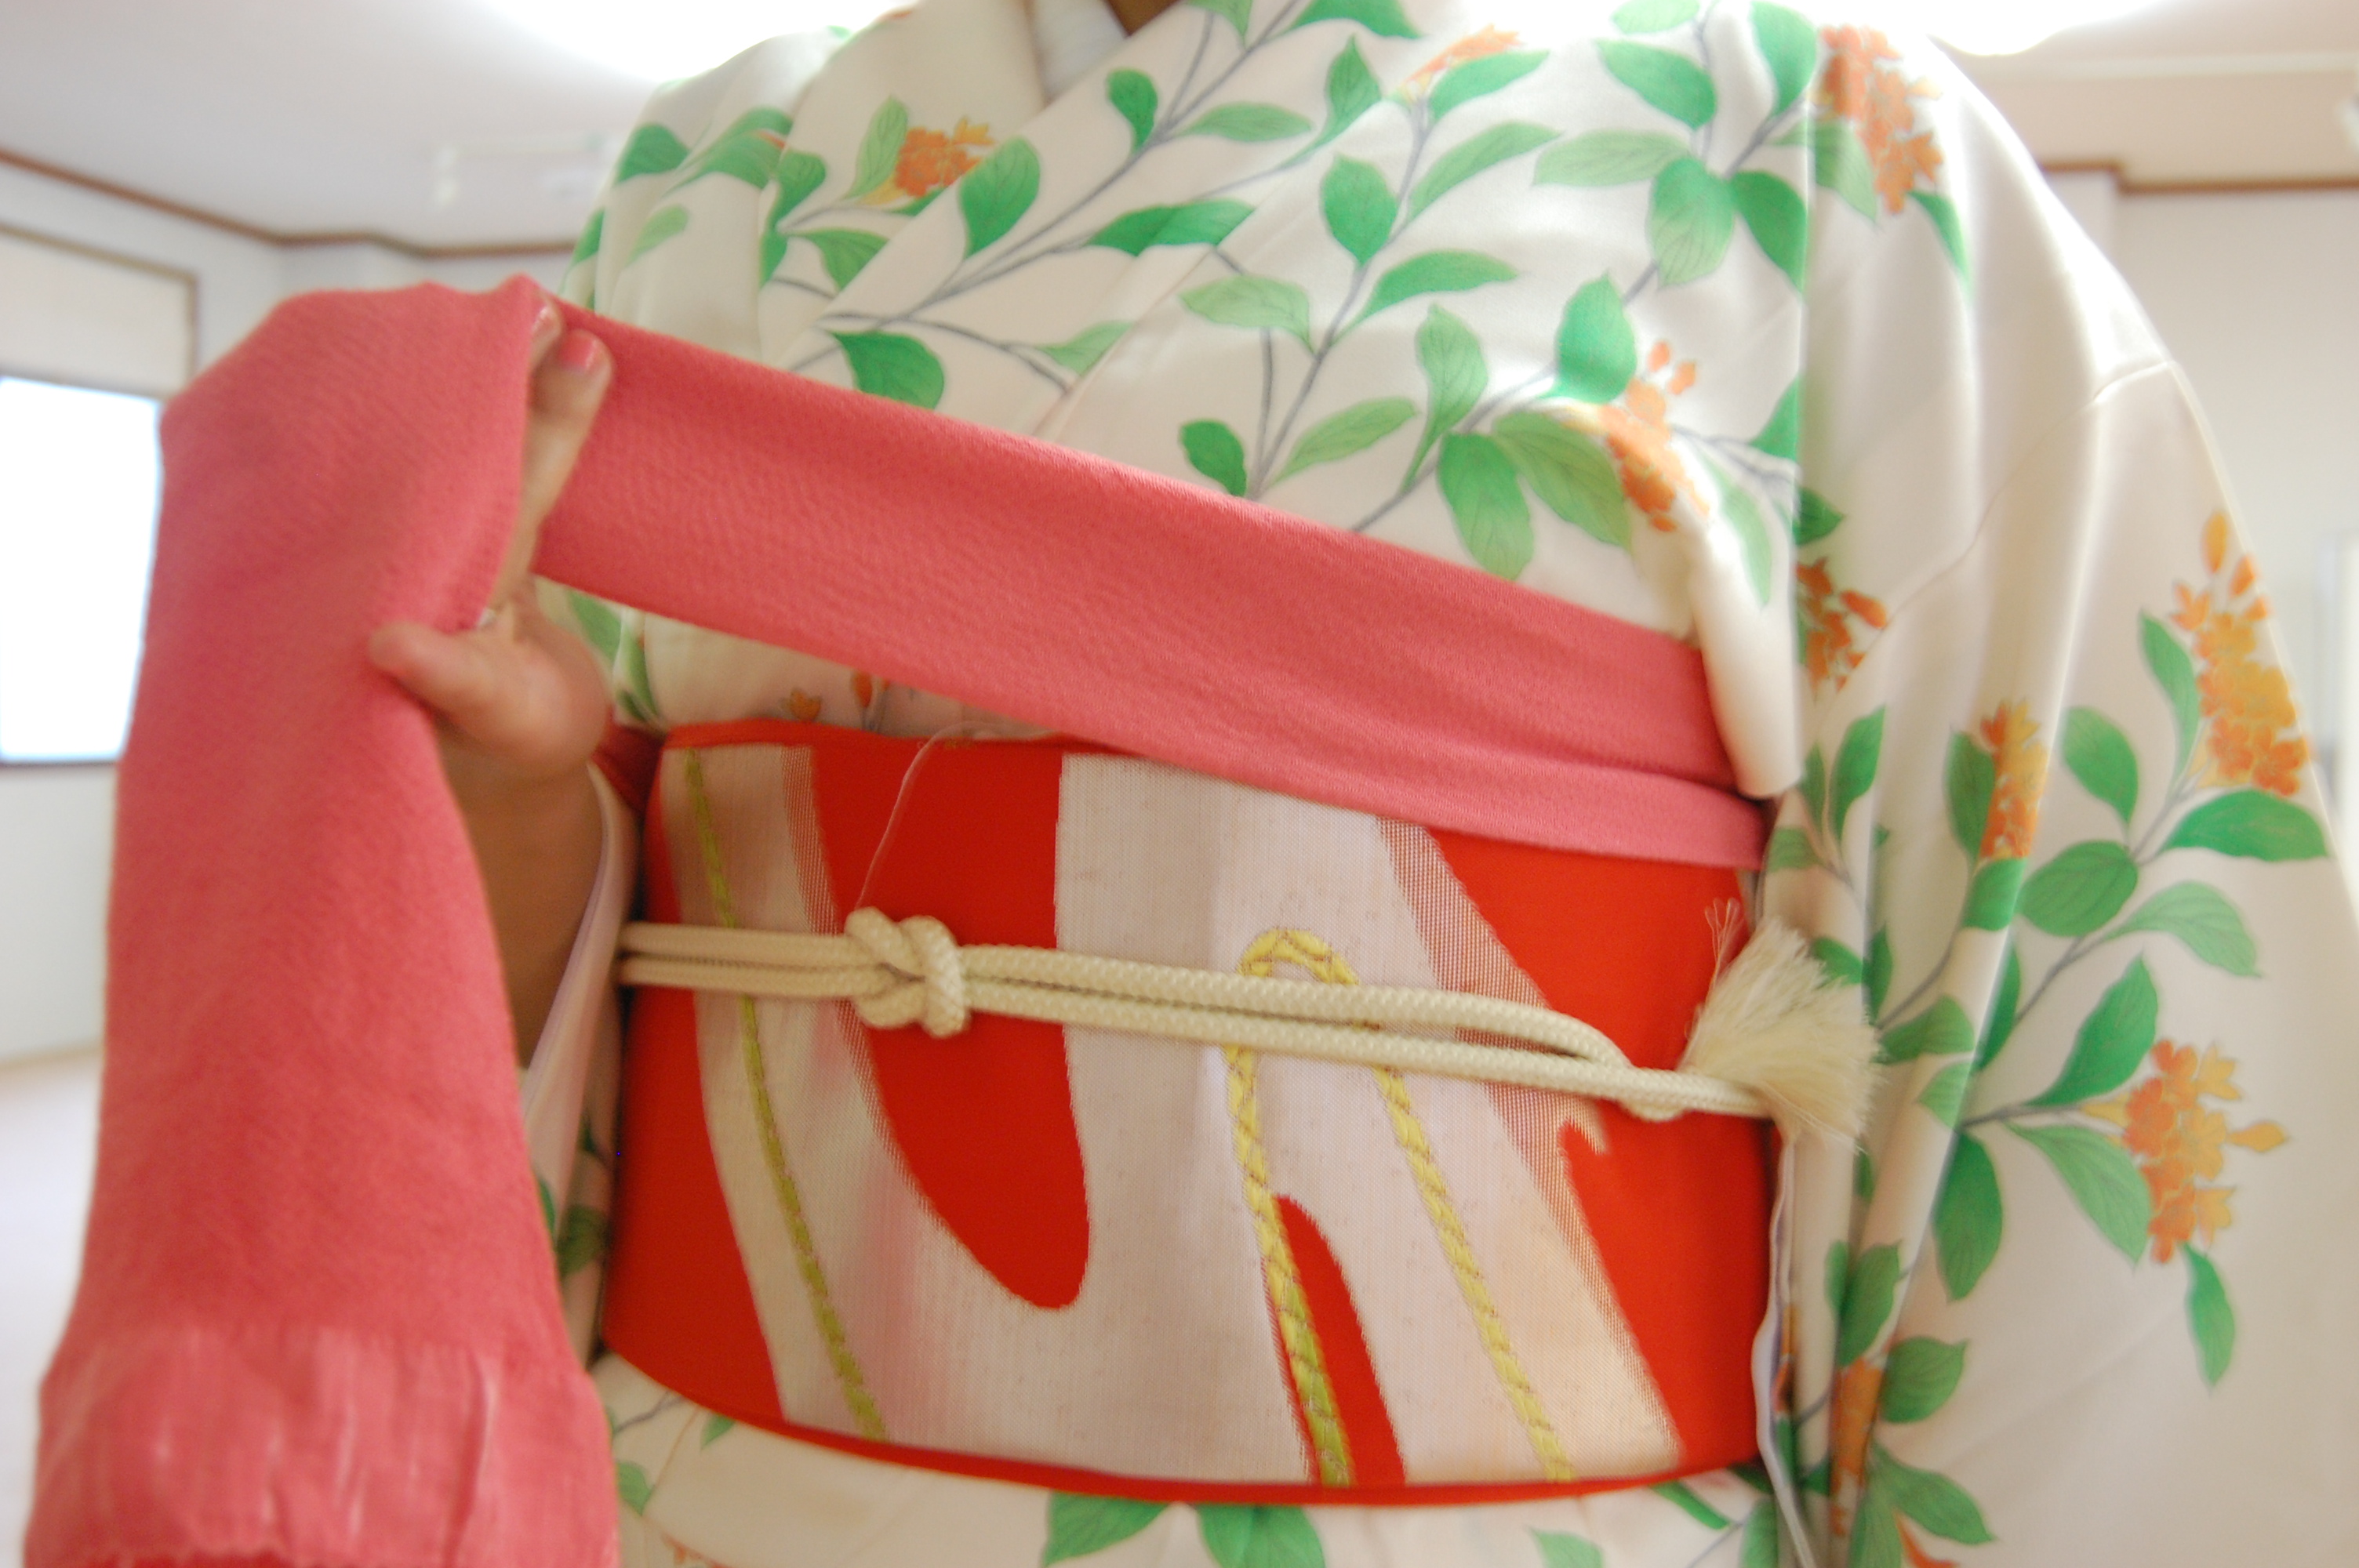
- Obi-makura – literally a pillow that is hidden underneath the bow or taiko to give its overall shape, with a full and blossoming type of musubi being more “kawaii†(style for young women) and festive.
- Obi-age – almost like a scarf, material used to cover the obi-makura and is tied in various ways at the center of the obi tucked inside with a bit peeking out; in my photos it is salmon pink colored
- Obi-jime – it is a cord/rope that wraps around the waist and ultimately keeps the obi in place as well as the shape of the “taiko.†There are various ways to tie the bows. The way to tie the obi has to do with formality and occasion, often more elaborate and decorative when worn with the furisode. If the cord is round, generally it used for formal occasions, as they can be tied in various ways. The flat ones often are worn for usual occasions. There is often a specific way for obi-jime to be tied, and the ends (tassles) are tucked in and point upwards; in my photos it is cream colored
- Obi-ita is very convenient, as it serves as a hard, thin, flat piece of plastic or cardboard that keeps the obi around your waist looking smooth and flat. It is hidden under the layers of the obi wrapped around your waist, often at the back as well as in front over the kimono; in my photos it is pink and attached around the waist with Velcro. Normally the hard part must be at your stomach while the Velcro ends attach at the center of your back, but since you will be putting on the obi yourself (in the front) and eventually twist it around your waist until the bow properly sits on your back, you must put on the obi-ita backwards, in other words, the Velcro is tied at your stomach.


- You will also need a long piece of cloth to be able to tie around the obi at your waist temporarily to keep in place until you are finished. And you will need another elastic piece of string that can be tied around your waist with Velcro to keep your taiko in its shape until you are finished.
How to tie the taiko musubi on yourself:
This style of musubi-kata is done at the front so that you can see it before it is finished, and you twist it around afterward so that the bow is in the back.
Step 1: The folded end should be placed over your right shoulder with the folded hem edge facing towards the body. It should drape over to the center of your back.


Step 2: At your waist above your navel, you then fold the obi diagonally so that the open hem edge is pointing up, and wrap it around your waist (towards the left) twice.


Ensure that when you tie the obi around your waist twice, each layer is perfectly flush.
Step 3: Hold the bottom-most layer (the point where you first folded it diagonally at the center of your waist in front) and the outer most layer, and pull apart (making it sit tighter around your waist).

Step 4: The taresaki which you are holding with your right hand will go underneath the tesaki end (that is now pulled off your right shoulder and folded over the obi) and folded diagonally inward up towards your face


Step 5: Here you should tie an easy bow around your obi at the center (making it easy to remove later) to hold it temporarily in place.


Step 6: Take the taresaki (the wide end of your obi) and place it over the center of the makura (covered with the obi-age ),

making the edge fold completely straight

and tuck the makura into the obi

so that it sits at the center, and tie the strings temporarily at your back.

Here you should remove the temporary tie you tied in Step 5.


Step 7: Bring the bottom edge of the wide obi bottom up, and fold it inwards with the fold coming at the bottom edge of your obi and having the last flap of fabric about the length of your finger – you have now made the taiko shape.

Step 8: Keep holding that folded edge and take the left folded end of the obi (tesaki) inside the taiko (from right to left).


Have the bottom edge of it meet the folded edge at the bottom of the taiko.


Using the obi-jime, place it evenly inside the taiko at the center with both ends coming out of either side and tie it behind you so that the taiko keeps its shape.

You should temporarily tie a string with Velcro around this part so that the fold and taiko is kept in place.

Step 9: Using your right hand at the top of your obi and your left hand at the bottom of the obi, carefully turn your obi around so that it is now behind you (turning toward the right) in the center and the taiko has kept its shape.


Afterwards you can slightly pull a bit back to the left so it gets rid of wrinkles at your back
Step 10: Now with the taiko behind you, you can now tightly tie the obi makura strings so the makura is tightly sitting against your back and tuck it in bottommost obi layer.


Temporarily tie the obi age loosely at the top so that it is out of the way. You must now tie tightly the obi jime at the center of the obi and make sure the ends are tucked in and pointed up.


Step 11: Now you must properly fold the obi-age scarf in thirds before tying a knot in the center and lastly tucking it in the obi and letting a little peek out.


Make sure all the knots are in line with the middle of your body.


Make sure that at the most a finger’s length of kimono fold (hashi ori) is peaking out from under the obi. Smooth out any wrinkles (especially near the bust at the front and back sides of the underarm slits.